You can change your name on Facebook without much trouble using the mobile app or the website on your computer. No matter why you want to update your name, you still need to follow Facebook’s rules to make the process go. Below is a complete guide on how to go about changing your name on Facebook.
Understanding Facebook’s Name Change Policy
Before taking the steps, it is essential to know Facebook’s name change policy.
Frequency: You can change your name only once in 60 days.
Acceptable Names: Your name should reflect how you are known in everyday life. Facebook does not allow:
- Symbols, numbers, unusual capitalization, or punctuation.
- Titles (like Dr., Mr., etc.) or phrases instead of names.
- Offensive or suggestive words.
- Characters from multiple languages in one name.
Nicknames: You can use a nickname as long as it’s a variation of your actual name (e.g., “Liz” for “Elizabeth”).
Steps to Change Your Name on Facebook
On Desktop
1. Log In: Open Facebook in your browser and log in to your account.
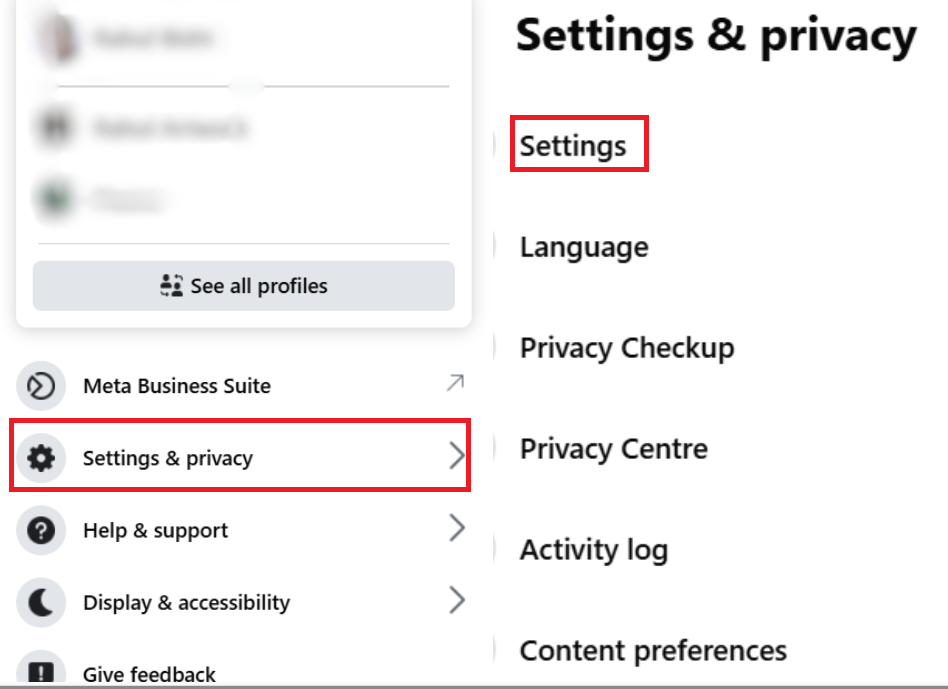
2. Access Settings: Click the down arrow at the top right of the page. Pick Settings & Privacy, then click Settings.
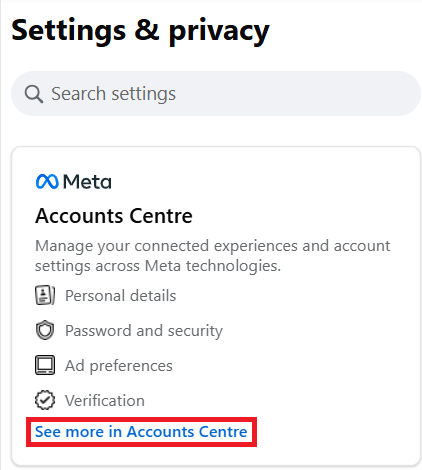
3. Navigate to Accounts Center: On the left side, click See More in Accounts Center.
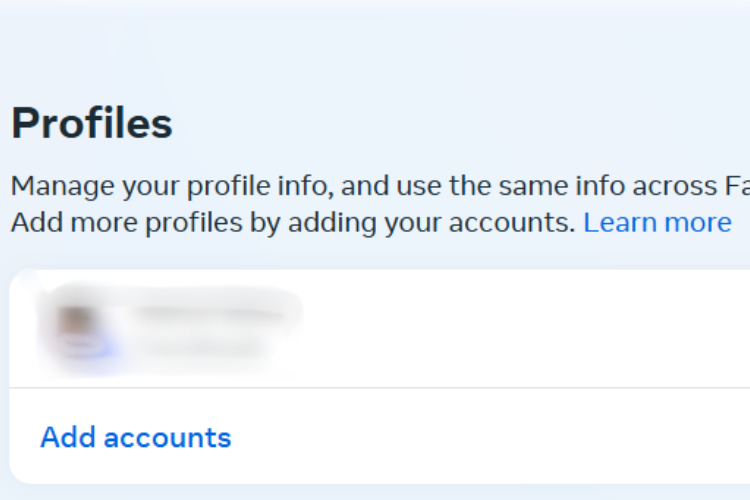
4. Select Your Profile: Under Profiles, click on your Facebook profile.
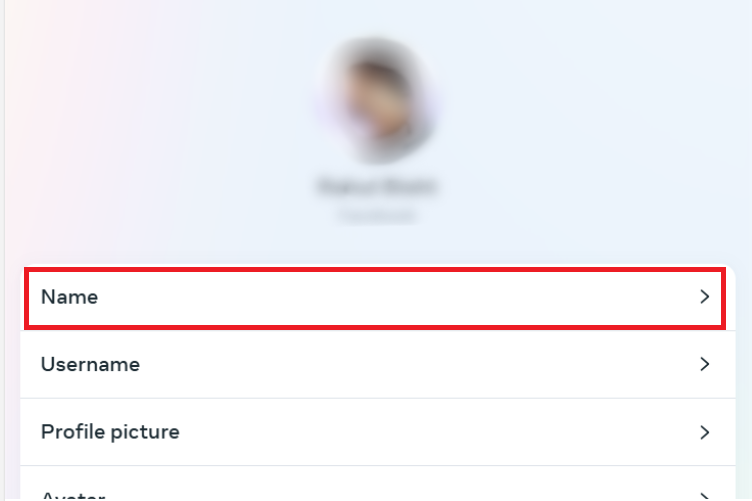
5. Edit Name: Click Name and type in the new first and last name you want.
6. Review Changes: Click Review Change to see how your updated name will look.
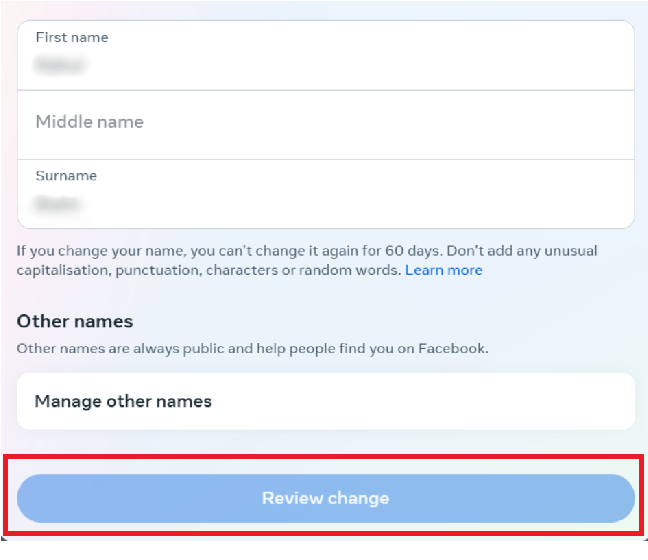
7. Confirm Password: Type in your password to confirm it’s you.
8. Save Changes: Click Save Changes to update your name.
On Mobile Apps (iOS and Android)
1. Open App: Open Facebook on your phone and sign in if you need to.
2. Access Menu: Touch the three lines (menu icon) at the screen’s bottom right (iOS) or top right (Android).
3. Settings & Privacy: Scroll down, tap Settings & Privacy, then pick Settings.
4. Accounts Center: Tap See more in Accounts Center from the list.
5. Select Profile: Select your account from the options shown.
6. Edit Name: Tap Name type your new first and last name, and add a middle name if you want.
7. Review Changes: Tap Review Change, then type your password when asked.
8. Save Changes: Lastly, tap Save Changes.
Important Considerations
- After changing a name, the user cannot change it again for 60 days, so they should do this mindfully.
- Ensure that the proposed name is in accordance with Facebook’s policies and does not violate them in any way that might cause the request to be rejected.
- If you encounter any issues during this process, check Facebook’s help center for additional assistance.
FAQs on How To Change Your Name On Facebook
Why can’t I change my name on Facebook?
If you’ve recently changed your name, Facebook may restrict further name changes for 60 days. Additionally, ensure your name complies with Facebook’s naming policies.
Can I use a nickname on Facebook?
If the name you wish to use is a nickname – like “Mike” instead of “Michael” – you can use it if it doesn’t violate Facebook’s real name policy, or you can enter nicknames in the “Other Names” section of your profile.
Will my friends be notified if I change my name on Facebook?
No, Facebook does not notify your friends that you have changed your name. However, it will change it on your profile; then, your friends could notice this when they check out your profile or view some posts.
How often can I change my name on Facebook?
You can change your name on Facebook once every 60 days, so choose your new name carefully.
Conclusion
The process of a name change on Facebook is quite easy and trouble-free if the considerations above are applied. You should choose an appropriate name that represents your real identity since Facebook is very strict about names. Once you’ve gone through the steps above, your new name will appear on your profile, and you will be ready to connect with friends and family under your newly updated identity.
Read Also


